

I was recently contacted by the wonderful people at Julep to partake in a DIY pedicure challenge inspired by the summer season. Oh boy, was I excited to do it! They have their own pedicure guide for those of you who want it.
Let me get this out first. One, summer season is already over and done here in the Philippines. Two, Julep is not locally available here. If they were, I’d definitely be using their polishes for this challenge and I would be one of the first people to get their hands on the Plié wand. Definitely makes manicures and pedicures easier for clumsy girls like — ahem — yours truly. (You would not believe how many polish splatters have decorated my bedroom floor, sheets and table.)
So why did I accept the challenge?
I do love bold and bright nail polishes. I may not be as eager to purchase them as I do with lipsticks but a bright spot of color on my nails and toes is one way to perk me up especially in this gloomy weather we’re having. Second, doing this reminds me how much I love summer — the beach, shorts, sandals, bikinis and colors.
FOOT PREP
Before you start, remove any leftover polish from your toenails with a nail polish remover.
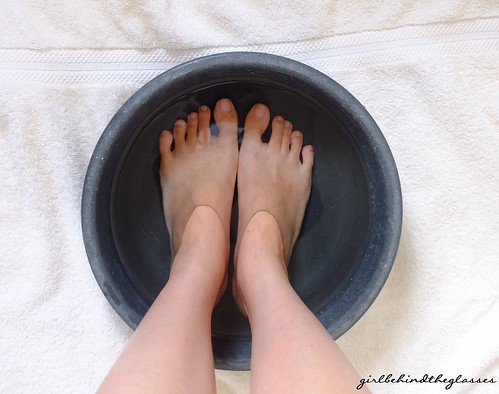
Step 1: Soak your feet in lukewarm water for a few minutes to soften up any calluses and relax your muscles.
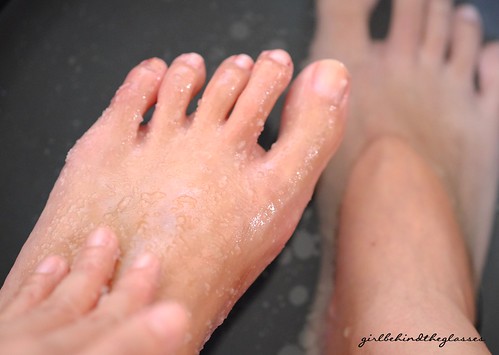
Step 2: Apply some salt scrub (Jericho Energizing Dead Sea Salt Scrub) and gently massage it onto your feet in circles to exfoliate dead skin cells and improve blood circulation. Get a foot file and scrub on areas with thicker calluses like your heel, for example. Then, rinse with warm water. Pat your feet dry.
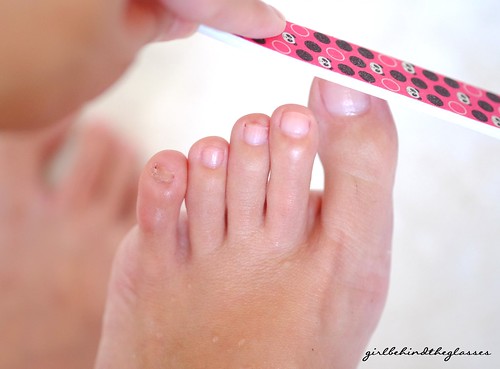
Step 3: Trim your nails and file them with an emery board according to the shape you want.
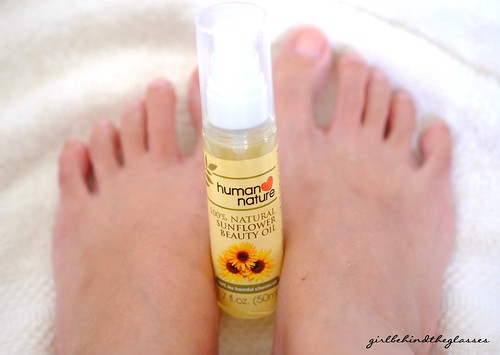
Step 4: Apply some cuticle softener (Human Heart Nature Sunflower Beauty Oil) on the base of your nails and gently push back with a cuticle pusher. Use of a cuticle nipper is entirely optional. Go ahead if you want to.
POLISH READY
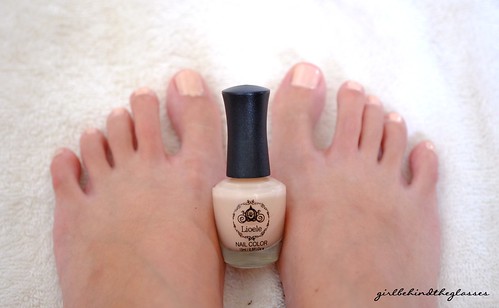
Step 5: Put on your toe separators and get ready to paint those clean babies. Apply one layer of your base coat followed by your choice of nail color and a topcoat. Wait at least 30 minutes for them to dry.
You can end it there but if you’re feeling pretty adventurous, I suggest doing a nail art.
GETTING CREATIVE
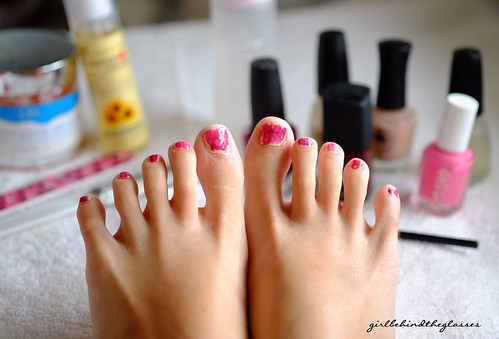
Of all the designs that ran through my mind, I chose to apply some watercolor effect on my nails. Granted I have only done those on my hands and never on my toes, but hey, there’s a first time for everything. Before you plan on doing this, make sure your base color is either a white or something like it and apply two layers of the top coat instead of just one.
Step 6: Dot blobs of your chosen color anywhere you want on the nail.
Step 7: Get a watercolor brush — I used RT Detailer Brush for this — and dip it in acetone/nail polish remover. (This is why you need to apply 2 layers of top coat to avoid your base color getting smudged.) Dab the brush on the blobs of nail polish repeatedly until you have achieved the watercolor effect you like.
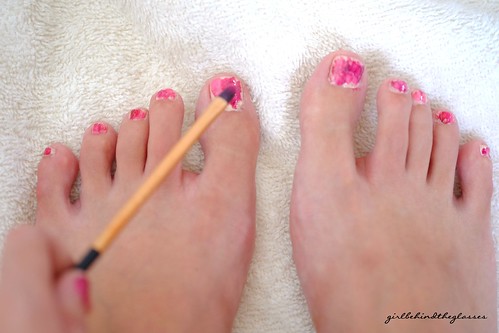
Step 8: Get another color of nail polish and repeat steps 7 and 8. You can add different colors as you wish. Don’t be afraid of overlapping them. Finally, add another layer of top coat. Clean up around the edges with a Q-tip dipped in nail polish remover.
And you’re done!
Below is a list of all the products I used:
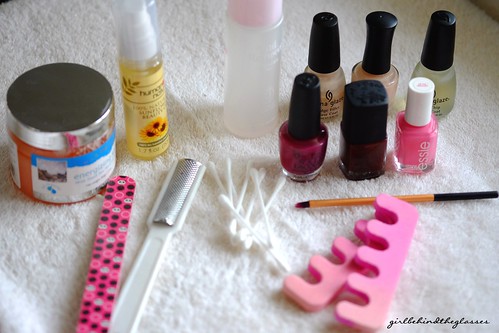
Foot file
Emery board
Human Heart Nature Sunflower Beauty Oil
Toe separators
China Glaze Ridge Filler Base Coat
Lioele Nail Color in #15 Baby Pink (a light milky pink)
China Glaze No-Chip Top Coat
Etude House Nail Remover #1 Mild
Real Techniques Detailer Brush
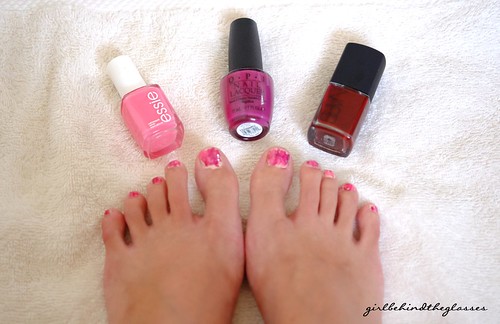
OPI Nail Lacquer Anti-Bleak (a deep, cool-toned purple creme, LE from the Mariah Carey Collection for Spring 2013)
NARS Chinatown Nail Polish (blood red
Essie Off The Shoulder (a bold, hot pink)
If you fancy getting yourself a pedicure, Julep has got some amazing tutorials you can follow. And you can shop Julep’s variety of nail colors here.
FYI, this is my first nail polish post. Celebratory dance and hugs all around you guys.

Don’t forget to follow me on:
BLOGLOVIN | PINTEREST | TWITTER | INSTAGRAM


YOU HAVE THE CUTEST FEET! I don’t mean to sound like a pervert, but man they’re really cute 🙂
I scrub my feet and paint my toe nails, but that’s about it! Nothing fancier. I’ve been thinking I should get it done professionally once these days though. It’s nice not to have to twist myself into all kinds of weird positions just to get my nails done.
LikeLike
Thanks Sunny! I have to get all bend-y for this post just to get pictures. LOL 😀
LikeLike
(You would not believe how many polish splatters have decorated my bedroom floor, sheets and table.) — haha same with me when i attempt to paint a nail art! btw your polish looks like flowers from afar 🙂
LikeLike
Thanks Shayne! Something must be done for us polish klutzes! haha 🙂
LikeLike
You have such pretty feet!
I hate you.
lol 😉 No seriously, you have really cute little feet! And that’s a very cute pedi.
LikeLike
Thank you! 🙂
LikeLike
Heh, my pedicure is always chosen by my husband, because he’s the one that gives me the pedicure! 😀 Obviously I can make requests, but I think it’s too funny watching him select a base colour, and then a glitter to go on top. He does a really good job, too!
You’re lucky you have photogenic feet – mine look like monster feet (to me, anyway) 😀
LikeLike
Lucky you Syl! I must make that a requirement for my future husband. Someone who is capable of color-coordinating bases and glitters! LOL
LikeLike
Pingback: August Mini Haul | Girl Behind the Glasses